Tools:

  • Chip brush
  • Newspaper or cardboard
  • 100 grit sandpaper

Supplies & Materials:

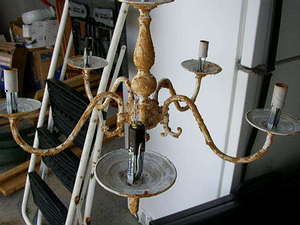
  • Old brass chandelier
  • Kilz or any water based primer
  • Sand (outdoor or Play sand)
  • Black Interior/Exterior spray paint (Flat or Matte)
  • Varnish (Spray or paint kind)

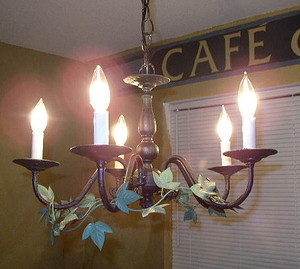
Finished Project

Wrought Iron Chandelier

Can you imagine that this was once a discarded, unwanted piece? Now turned into a beautiful piece of artwork!

Below you will find step-by-step directions on how to create this one of a kind piece. Of course you can add your own details and different colors to suit your taste. What you will find out is that it doesn't take much to create something so unique to fit your personality.

Our thrift store find!

Step 1
(You can find these brass chandeliers everywhere. Look around your house or perhaps ask friends and neighbors if they have something similar to this that they would like to get rid of. Also try yard sales and thrift stores .... I happened to have found this in a discarded pile in a thrift store....very inexpensive!)

Clean the brass with water and lightly sand it with fine grit (100 & up) sandpaper. This will help the primer adhere to the brass.

Make sure you take off the light bulbs and plastic holders.

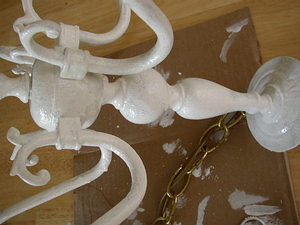
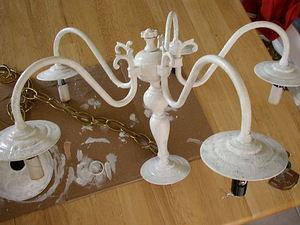
Primed Chandelier

Step 2

Next, prime all of the brass with a water based primer such as Kilz. This is the brand that we prefer when refinishing items. Be sure to place some kind of paper or cardboard (shown here) underneath the chandelier to protect your workspace. Water based primers are difficult to remove from surfaces once they have dried, so remember to always protect tables and clothes!

Use a chip brush (found at any local hardware or paint store) to discard once you are done priming.

Allow to dry for about 30mins to an hour.

Pounced Chandelier

Step 3

After the first coat of primer has dried, apply a second coat of primer, but this time pounce the primer onto the chandelier.

Let this second coat of primer dry for about 30mins to an hour.

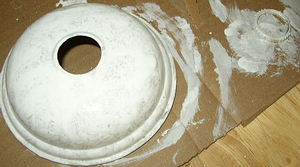
Don't forget the ceiling plate and ring!

Step 3a

Don't forget to prime the ring and plate that attaches the chandelier to the ceiling.

Notice in the picture how the primer does not have a smooth look to it. This is what the "pounce" creates when applied to the second coat.

Pounced Chandelier

Step 4

Next, apply a third coat of primer in the same manner as Step 3.

This time though, you will not wait until the primer is dry.

Chandelier with sand applied on it

Step 5

Now the fun part! If you have kids, this would be the time to get them to help! I used sand from my front yard to apply to the wet primer, but you can use regular sand or better yet, play sand!. Put the sand in a pan or pot and soak it in water until it is moist. You should be able to clump it in your hands when it is moist enough.

You will literally just cake it all on the chandelier. Go heavy in some areas, and light in others. You don't have to apply it on top of the candle rings since this will not be seen when hung up. Let dry for about 30mins to an hour.

Second coating of sand

Step 5a

When chandelier is dry, apply a second (light) coating of moist sand. This will help create the old wrought iron look of the chandelier when it is painted.

Close up of finished look

Close up of wrought iron look

Step 6

After the second application of sand has dried, grab the chandelier by the chain and lightly tap it on the grass to shake off the excess sand. You want to make sure all loose sand is taken off. You can also use a soft, loose, bristle brush to loosen the sand, but just make sure you don't rub too hard on it or else it will take all the sand off.

Next, take some black (flat or matte) spray paint and spray several coats. Make sure to let the paint dry between coats. I used about 3 coats of paint to get the finished effect.

When the last coat has dried, spray (or brush) on matte varnish to help preserve the look. Don't forget to paint the ceiling plate and ring from Step 3a. The chain can be spray painted, granted you remove the wire cord from the middle of it ...... I personally like the look of fabric to hide the chains.

Now you have a beautiful wrought iron looking chandelier for a fraction of the price of a real one! Go ahead and try this...see how easy it really is!

To ask questions or have comments about this project, please email us at: projects@peaydesigns.com. If you have tried this project (as shown above) please let us know! Send pictures to show how yours turned out!!

2003© Peay Designs


<< Previous Contact us: info@peaydesigns.com Next >>